-
[라이노&브이레이] 라이노 브이레이로 툰레더링 돌리는 법!!라이노&브이레이 팁 2019. 3. 31. 16:53728x90
많은 건축학도들이 핀터레스트 등을 통해 화려한 판넬 레이아웃을 접한다. 그러나 학교에서 가르쳐 주는 것은 기본적인 모델링이나 설계에 대한 조언 뿐 그것을 어떻게 판넬에 담아내는지 그 방법조차 가르쳐주지 않는다. 아무리 설계를 잘해봤자 그것을 이쁘게 담아내지 못한다면 좋은 점수를 기대하기 힘들다.
필자 또한 고학년이 아니므로 많은 것을 알고 있지는 않다. 하지만 내가 알고 있는 작은 정보가 판넬의 퀄리티를 조금이나만 올릴 수 있을 것이라 굳게 믿는다.
이 시간은 라이노와 브이레이를 통한 툰레더링을 배워볼 것이다.
툰렌더링이란??
흔히 다이어그램을 제작할 때 많이 쓰이며 등각투상도로 보여줄 때가 많다. 요즘 판넬의 추세는 평면도를 수직화하여 아이소메트릭 뷰를 보여주는 것이다.

사진은 모두 pinterst에서 구했다.
이처럼 외곽선이 돋보이는 다이어그램을 보여주면 정보전달에 효과적이다. 이러한 효과를 구현하는데는 일러스트와 캐드를 이용하는 등 다양한 방법이 있는데 라이노와 브이레이를 이용하는 것이 가장 간단하므로 이 시간은 라이노 브이레이를 통한 툰레더링을 알아보도록 하겠다. 3초면 끝난다. 정말정말 간단하다.
1.먼저, 라이노에서 모델을 만든다.
2.뷰설정-등각 투영-자신이 원하는 뷰를 설정한다.
3.브이레이를 켠 뒤 왼쪽 하단에서 Generic 생성.
4.똑같은 방법으로 Toon 생성한 뒤 Base Material에서 /Generic 을 클릭. 만약, 레이어마다 다른 툰렌더를 먹이고 싶다면 레이어마다 다른 Generic들을 생성해서 그에 각각 Toon을 생성해야 한다.

5.라이노에서 객체를 선택한 다음 브이레이에서 Apply Material To Selection 클릭.
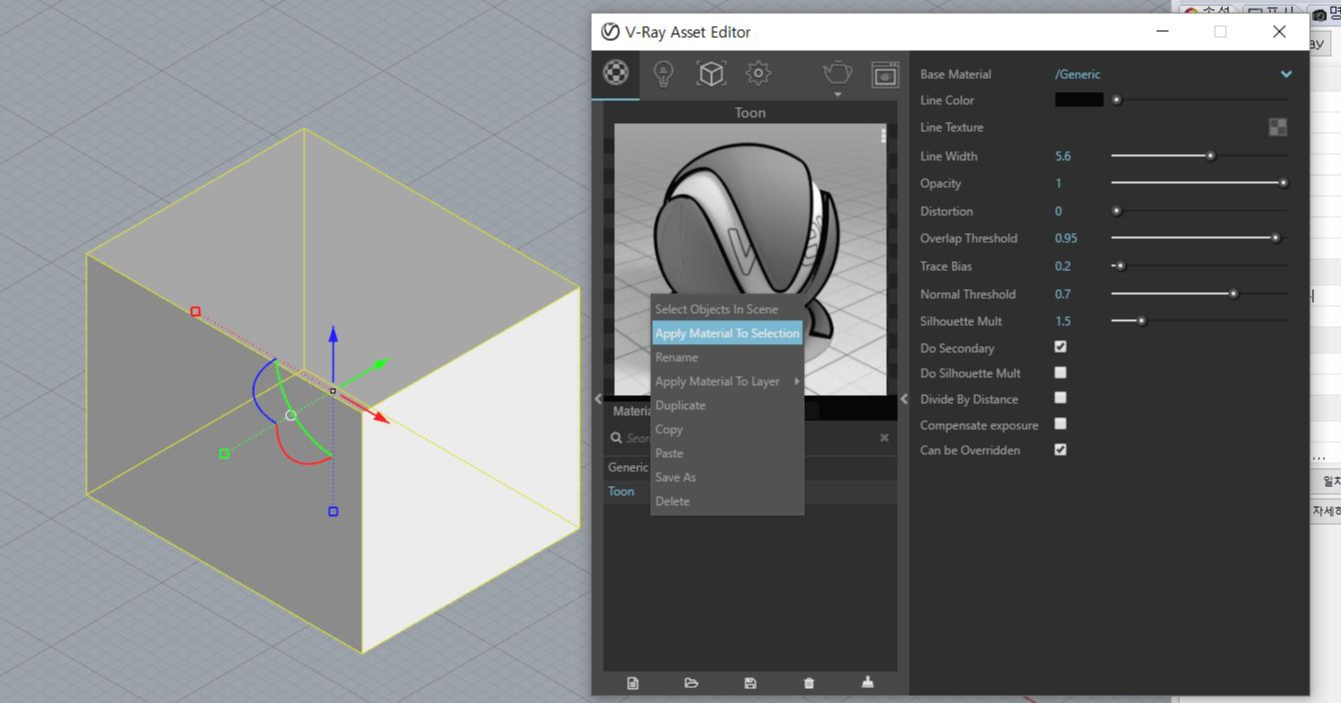
6.오른쪽 상단 주전자 버튼을 클릭하면 끝.
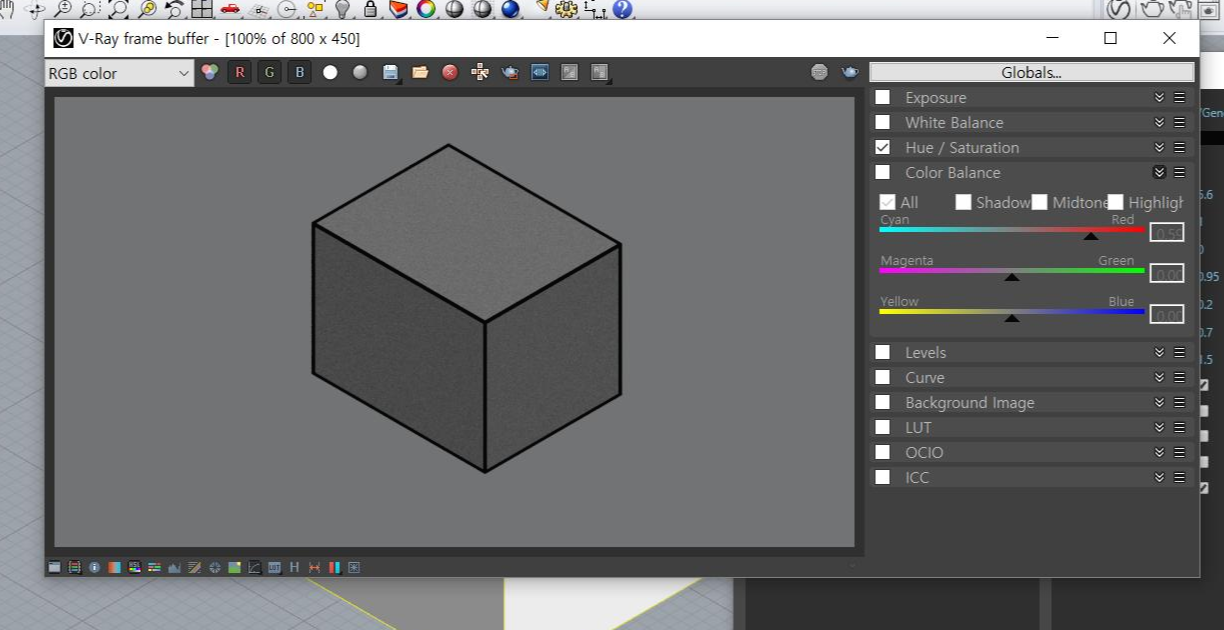
정말 쉽다. 색상을 바꾸고 싶다면 Generic에서 바꿔야 한다. 선의 색상과 두께는 Toon에서 바꿔야 함을 유의할 것.
